10 Steps for Seasonal Closet Swaps
- Contact QueenBee
- Sep 28
- 9 min read
Seasonal closet swaps help you stay organized, save time, and make mornings easier. By rotating your wardrobe based on the season, you reduce clutter, care for your clothes, and create a functional space. Here's a quick breakdown of the process:
Clear Out: Empty your closet completely.
Clean: Dust, vacuum, and tighten loose hardware.
Sort: Divide items into keep, store, donate, or repair piles.
Inspect: Check for stains, wear, or damage.
Wash & Repair: Clean and fix items before storing or using.
Choose Storage: Use bins, garment bags, or vacuum-sealed bags.
Pack & Label: Organize off-season clothes and label containers.
Reorganize: Arrange current-season clothes by type or color.
Rotate Accessories: Swap seasonal accessories and keep them tidy.
Plan Ahead: Schedule your next swap and do monthly check-ins.
How to Swap Out Seasonal Clothes: Organize Your Closet for Fall
Supplies and Workspace Setup
Getting ready with the right supplies and setting up a functional workspace can make your closet swap a smooth and efficient process. Once you’ve got everything in place, you’ll be ready to tackle your closet step by step.
Gather Your Supplies
Start by assembling everything you’ll need to stay organized during the swap. This includes storage containers, cleaning supplies, and labeling tools to help sort and manage your items effectively.
Block Out Enough Time
Make sure to plan ahead and set aside a full weekend to complete your closet swap without feeling rushed. This time will allow you to carefully assess, declutter, clean, and repair your clothing, which is essential for keeping your wardrobe in good condition. Trying to rush through the process might mean skipping important steps like removing stains or handling repairs.
"Nothing will make stains become permanent more than storing dirty clothes for six months. Plus, cleaning before storing will help keep the dreaded clothing moths at bay." - Tracy McCubbin, Organizing Expert and Founder of dClutterfly
Choose a weekend when you’ll have uninterrupted time. Avoid scheduling this during busy weekends or when you have family commitments, so you can focus entirely on the task.
Create a Sorting Area
Set up a dedicated area to sort your clothes. A clean, well-lit spot - like a guest room or a cleared table - works best. Use this space to divide your clothing into separate piles: keep for the current season, store for the off-season, donate or sell, and items needing repair or cleaning.
Good lighting is crucial for inspecting your clothes. It helps you spot stains, worn areas, or anything that might need fixing. If your chosen area doesn’t have enough light, bring in extra lamps or work during the day near a window. A comfortable chair nearby can also come in handy for closer inspections or when you need a quick break.
Having an organized workspace not only makes the process more manageable but also protects your clothing as you work through the swap.
10 Steps for Your Seasonal Closet Swap
Ready to tackle your closet? Here’s a step-by-step guide to streamline the process and make your seasonal wardrobe swap as smooth as possible.
Step 1: Empty Your Closet
Start by completely clearing out your closet. Yes, that means everything - clothing, shoes, accessories, hangers, and any other items lurking in there. Don’t forget to include pieces stored in other areas, like dressers or bins, that are part of your wardrobe.
Use your bed as a central spot for everything. This creates a clear workspace and gives you extra motivation to finish before bedtime.
"Empty your closet. Yes, the whole thing. Completely empty. Don't worry about sorting yet, just move everything to your bed. If you put everything on your bed, you'll be motivated to complete the project before bedtime." - Be More with Less
For now, focus on emptying the space without worrying about sorting - it’ll keep the momentum going.
Step 2: Clean the Closet
With your closet completely empty, take this opportunity to give it a good cleaning. Dust shelves, hanging rods, and even the ceiling. Vacuum or sweep the floor, paying extra attention to corners where dust tends to gather.
Use appropriate cleaning products for the surfaces. For wooden shelves, try a wood cleaner or a damp cloth followed by a dry one. Wire shelving works well with a mild all-purpose cleaner. Tighten any loose hardware to prep the space for reorganization.
Step 3: Sort Items by Category
Now comes the decision-making part. Divide everything into piles: items to keep for the current season, store for later, donate, sell, or toss. Work through one category at a time - like tops, bottoms, outerwear, or accessories. This method helps you see everything you own and spot duplicates or items you no longer need.
"The KonMari method has you gather everything in the category you're tidying up so that you're looking at the full assortment of what you own and there are no after the fact 'oh shoot' situations." - Charmed by Camille
Step 4: Inspect Each Item
Examine each piece under good lighting. Look for stains, tears, missing buttons, or signs of wear. Ask yourself a few key questions: Have I worn this in the past year? Does it fit well? Is it still relevant to my lifestyle? Be honest - if something no longer serves you, it’s time to let it go.
Step 5: Wash and Repair
Before storing or putting items back, address any cleaning or repair needs. Wash or dry clean anything that’s dirty - storing unclean clothes can cause permanent stains or attract pests. Handle minor fixes like sewing on buttons or patching small tears. For larger repairs, decide if it’s worth fixing or replacing the item.
Step 6: Choose Smart Storage
Pick storage solutions that fit your space. Vacuum-sealed bags work well for bulky items, while clear, moisture-resistant plastic bins are ideal for other pieces. Avoid using cardboard for long-term storage, as it doesn’t protect well against moisture or pests.
Step 7: Pack and Label Off-Season Clothes
Fold or roll off-season items neatly before placing them in containers. Group similar pieces together - for example, sweaters in one bin and summer dresses in another. Label each container clearly with its contents and the season, like "Winter Sweaters – Wool & Cashmere" or "Summer Dresses."
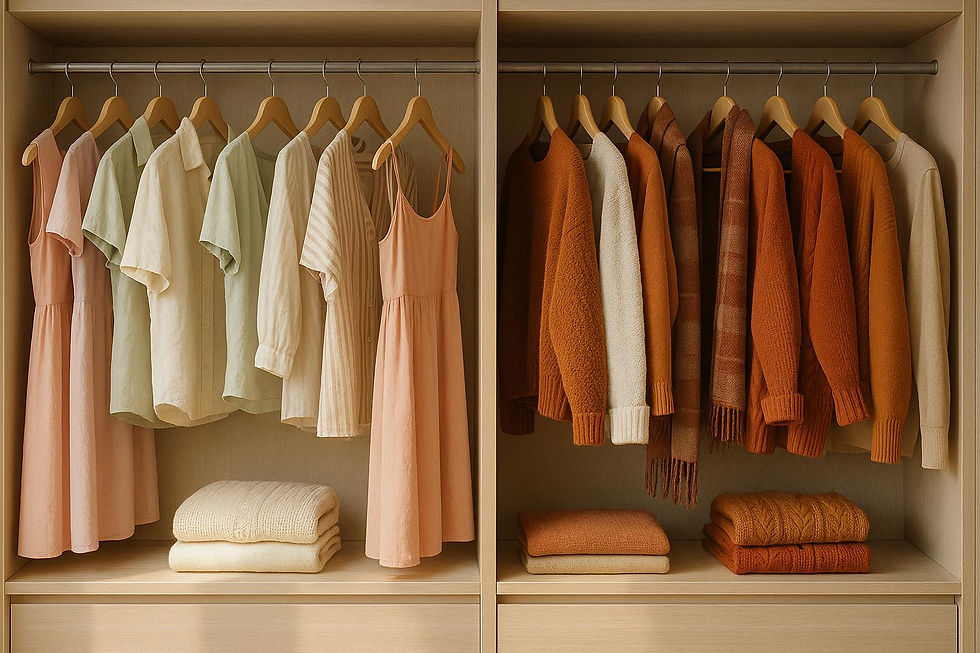
Step 8: Organize Current Season Clothing
Arrange your current wardrobe to make getting dressed easier. Group similar items together - like pants in one section and tops in another - and consider organizing by color or frequency of use. Use matching hangers for a polished look. Velvet hangers are great for delicate fabrics, while wooden hangers provide sturdy support for heavier items like coats. Keep frequently worn pieces at eye level for quick access.
Step 9: Rotate Accessories
Switch out your accessories to match the season. Store heavier winter items and bring out lighter summer options. Use drawer dividers, small bins, or hanging organizers to keep belts, scarves, and jewelry tidy and easy to find.
Step 10: Add Finishing Touches and Plan Ahead
Wrap things up with a few thoughtful touches. Add small organizers for jewelry, hooks for frequently used items, or a basket for dry cleaning. To keep your closet in shape, set a reminder for your next seasonal swap in six months. Doing a quick monthly check-in can also help prevent clutter from creeping back in.
For professional tips and help with organizing, reach out to Queen Bee Organizers.
Storage Tips and Long-Term Solutions
Once you've chosen your storage method in Step 6, it's time to refine your strategy with smart, long-term solutions to keep your wardrobe in great shape. Thoughtful storage not only protects your clothes but also makes seasonal closet transitions much smoother.
Storage Options Comparison
Different storage methods work better for specific clothing types and spaces. Here's a quick breakdown of the most popular options, along with their benefits and drawbacks:
Storage Type | Best For | Pros | Cons |
Clear Plastic Bins | Most clothing types | Transparent, stackable, pest-resistant | Bulky, may crack over time |
Vacuum-Sealed Bags | Bulky items like coats | Saves space, airtight protection | Wrinkles delicate fabrics, punctures easily |
Cedar Chests | Natural fiber clothing | Deters pests naturally, adds charm | Heavy, costly, limited capacity |
Garment Bags | Suits, dresses, and coats | Prevents wrinkles, ideal for hanging | Takes up closet space, minimal pest protection |
Under-Bed Boxes | Everyday items and shoes | Maximizes unused space, easy access | Limited height, may collect dust |
Clear plastic bins are a solid all-around choice. They shield against moisture and pests while letting you see what’s inside. Opt for bins with tight lids and thicker plastic to avoid cracking. Use this table as a guide to pick the best storage option for your needs and available space.
Protect Against Moisture and Pests
Moisture and pests are the biggest threats to stored clothing, but a few simple steps can help you avoid damage.
Silica gel packets: These absorb moisture and prevent mildew. You can buy them in bulk or reuse ones from shoe boxes or electronics packaging. Toss a few into each storage container for added protection.
Cedar blocks: Naturally repel moths and other insects. To keep them effective, give them a light sanding when the scent fades.
Lavender sachets: These not only keep your clothes smelling fresh but also act as a mild insect deterrent. You can make your own by filling small fabric pouches with dried lavender or buy pre-made sachets from home stores.
Store your items in a cool, dry spot away from direct sunlight. Avoid areas like attics or basements, which often have fluctuating temperatures and humidity. Instead, aim for a bedroom closet, under-bed storage, or a climate-controlled space.
Choose Eco-Friendly Methods
Sustainable storage solutions can save you money and reduce waste.
Repurpose what you have: A suitcase can double as off-season storage, while an old pillowcase can hold delicate items or shoes.
Invest in quality storage: Durable plastic bins, cedar chests, and canvas garment bags may cost more upfront, but they last longer, saving you from frequent replacements.
Natural pest repellents: Cedar, lavender, and rosemary are safer alternatives to chemical mothballs - effective without the harmful fumes.
Breathable fabric bags: Cotton or canvas storage bags allow air circulation while keeping dust away, making them a great option for long-term use.
Think about the lifespan of your storage tools. A well-maintained cedar chest, for example, can last for years, making it a cost-effective and eco-conscious choice.
For added help, professional organizers like Queen Bee Organizers can assist in creating storage systems tailored to your space and lifestyle, simplifying your seasonal wardrobe swaps year after year.
Conclusion: Keep Your Closet Organized All Year
A seasonal closet swap doesn’t have to feel like a daunting task if you follow these 10 straightforward steps. By breaking it down - starting with clearing everything out, giving your closet a deep clean, and then sorting, storing, and arranging your clothes - you’re setting up a system that works for you. Think of it as an investment in simplifying your daily life, especially those busy mornings.
The secret to long-term success? Consistent upkeep. Dedicate just 15 minutes each week to returning items to their proper places, and plan a quick monthly check-in to address small issues before they grow. This habit keeps your closet functional and makes those seasonal transitions a breeze.
An organized closet doesn’t just save time - it reduces the stress of outfit decisions, helps you see what you already own, and even prolongs the life of your clothes through better care. In the end, it’s a simple way to save money and make your mornings run smoother.
FAQs
How can I keep my seasonal clothes safe from pests and moisture while in storage?
To keep your seasonal clothes safe from pests and moisture, start by ensuring every item is clean and completely dry before you pack it away. This simple step prevents nasty surprises like odors or mildew later on. Opt for breathable storage bags made from cotton or linen - these allow air to circulate and help avoid mold or mildew buildup. Toss in natural repellents, such as cedar blocks or lavender sachets, to keep moths at bay without using harsh chemicals.
If you’re worried about moisture, add silica gel packets or other desiccants to your storage containers. For maximum protection, airtight plastic bins with secure lids are an excellent choice - they block out both pests and humidity. However, steer clear of plastic covers, as they can trap moisture and encourage mold growth. Lastly, pick a cool, dry, and well-ventilated spot for storage to ensure your clothes stay in great shape until you need them again.
What are some sustainable ways to store seasonal clothes?
When you're storing seasonal clothes, think about using breathable cotton garment bags. They’re great for keeping moisture at bay and can be reused for years. Another option? Bamboo storage bins or recycled cardboard boxes. These are practical alternatives to plastic containers and offer a more environmentally friendly way to keep your closet tidy. Plus, they help cut down on waste while keeping your clothes in good shape.
How often should I do a seasonal closet swap to stay organized?
To keep your wardrobe tidy and practical, consider scheduling a closet swap twice a year - once in the spring and again in the fall. These times coincide with significant weather shifts, making it easier to adjust your clothing and accessories to suit the season.
Each swap is a great chance to declutter, organize, and store your off-season items properly. This habit not only keeps your closet manageable but also ensures your wardrobe stays aligned with your current preferences and lifestyle.